November 19, 2013 at 2:25 am (Food/cooking, healthy, home cooked)
Tags: chili, cumin, delicious, easy, family, foodie, friends, fun, healthy, home cooked, hot, hot pepper, kidney beans, party, spicy, supper, tomatos, turkey

This a delicious and healthy recipe for the whole family to enjoy.. Also a great recipe to serve at a party or sports event!
Mixed Bean Turkey Chili
You will need:
- 2 lbs of ground Turkey
- 1 large can of mixed beans
- 1 onion diced
- 3 cloves of diced garlic
- 2 peppers any color, diced
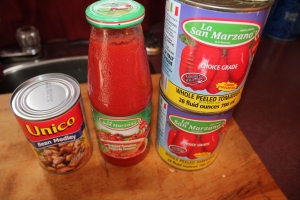
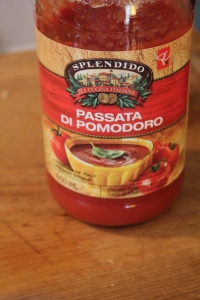
- 1 Jar Strained Tomatos
- 2 cans of diced or whole tomatoes
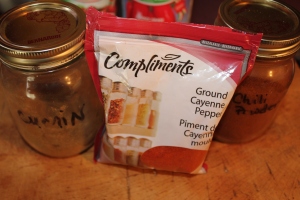
- 1 tsp Ground Cumin
- 3 tsp chili powder
- 1 tsp of chili flakes
- 1/2 tsp of cayenne powder
- 2 whole hot peppers with sliced holes in the pepper
- 2 tbsp EVOO
Turn on your burner to 8, add your EVOO, when warmed up add your ground turkey
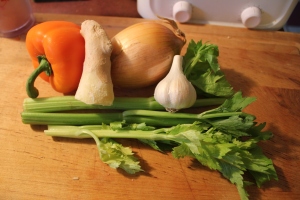
While the ground turkey is browning, prepare your fresh veggies!
When meat is browned add your veggies.
Then add the can of beans!
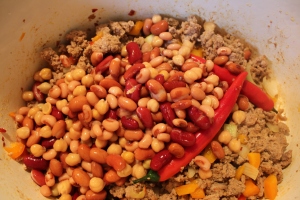
Season with spices
Mix together and then add tomato products
Let cook out for at least an hour.. Even better when left over night and reheated!
When its cooked and ready to eat you can eat this alone, or with onions and cheese on a hot dog, nacho’s or make yourself a plate of chili cheese fries.. It’s as healthy as it’s going to get and just as tasty!
So this is my blog for today hope you all enjoyed.
I am interested in hearing your comments and your ideas. If you have a recipe you would like to see me blog about I would love to hear from you and give it a try. I am always up for trying new things. I can be emailed at schoonerpixie@hotmail.com or I can be found on facebook at https://www.facebook.com/SchoonerpixiesKitchen?ref=hl.
I look forward to hearing from you!!
Until next time enjoy & happy cooking!!
1 Comment
November 12, 2013 at 4:52 am (Food/cooking, Uncategorized)
Tags: cheese, diet, family, healthy, low carb, quinoa, whole grain

Hey there, I have been working hard at this eat clean reset but have been enjoying it, trying out new dishes that are healthier not only for but for my family too. Was looking around for a great side dish recipe and thanks to a referral to https://www.facebook.com/jasonsfunctionaltrainingstudio, I found some great dishes and decided with a little tweaking of my own to share this dish with you first!
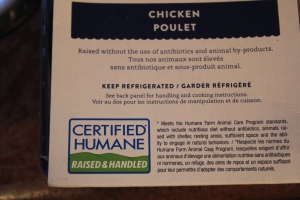
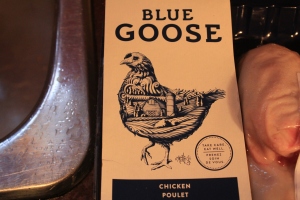
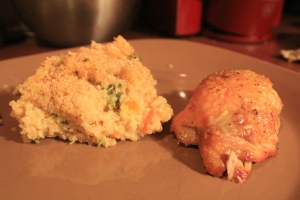
I served this dish with a main course of baked chicken thighs from Blue Goose.
http://www.bluegoosepurefoods.com/#home
Blue Goose is raised with out the use of antibiotics and animal by-products.
Preheat the oven to 400 degrees put salt & peppered chicken on a bakers rack (which helps the chicken from baking in it’s own fat) Bake in oven for 40 minutes until skin is crisp. For those of us that are watching our calorie intake remove the skin. 😉

You will need:
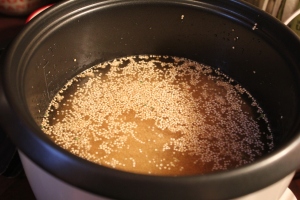
- 3 cups Cooked Quinoa (cooked According To Package Instructions)
- 1 cup broccoli florets, chopped into small chunks
- 1/2 red bell pepper, diced
- 4 raw carrots, sliced thinly
- Handful baby spinach
- 1/2 cup corn peas
- 1/4 cup olive oil
- 1 garlic clove, mince
- 3 Tbsp. whole wheat flour
- 1 1/2 cups milk
- 2 cups shredded cheese (I used half skim mozza as it is lower in fat and half cheddar)
- Kosher Salt and pepper, to taste
- 2 Tbsp. Panko breadcrumbs (optional)
Roasted Vegetable Cheesy Quinoa Mac
Cook your Quinoa as per the directions on the box. I cook mine in a rice cooker with chicken stock!

Prepare a large baking sheet by lining with aluminum foil and coating with a little olive oil or nonstick cooking spray.
Place prepared veggies on the baking sheet.
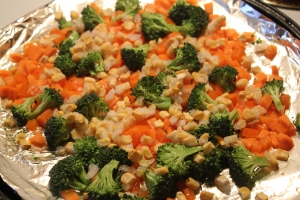

Bake for 20 minutes, or until vegetables have softened. Remove from oven and set aside.
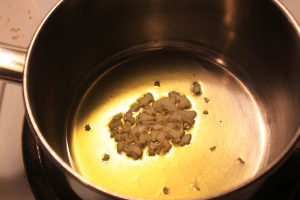
Meanwhile, heat oil in a large skillet over medium heat. Once hot, add garlic and cook 30 seconds.
Whisk in flour and cook 1 minute

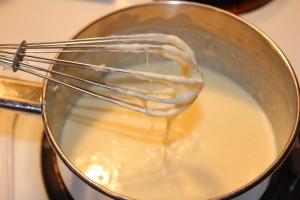
Gradually whisk in milk, stirring constantly until mixture is slightly thickened. Remove from heat
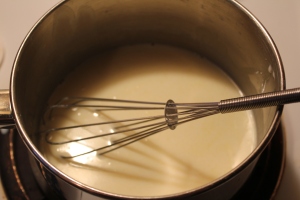

Stir in cheddar cheese until well distributed and melted. Add salt and pepper and additional spices as desired.
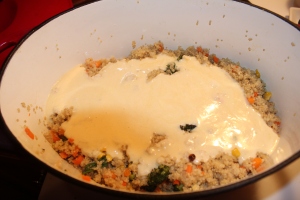
Mix veggies, cooked quinoa, and cheese sauce together.
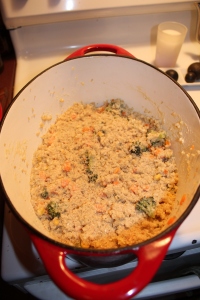
Place mixture in a baking dish or ramekins and sprinkle with panko breadcrumbs. Place under the broiler in your oven (500 degrees) for 2-4 minutes, or until the top is golden brown.
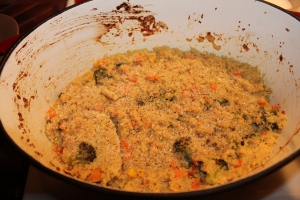
After broiled it is ready to be served and enjoyed.. Guilt free and healthy!
Thanks so much for checking out my blog! I love to share my recipes with you all with the hopes that you make an attempt to cook them for yourself or for your family and friends. If you have any comments or any ideas on a new recipe I should try out I would love to hear from you. I can be found on face book at https://www.facebook.com/SchoonerpixiesKitchen or by sending me an email to schoonerpixie@hotmail.com. I look forward to hearing from you!
Until next time Happy Cooking & Cheers!
Leave a Comment
November 4, 2013 at 6:19 pm (Food/cooking)
Tags: bean sprouts, carrot, easy, family, garlic, ginger, healthy, onion, soup, spinach, sweet potato, tomato, turnip, vegetable, vegetable stock, vegetarian

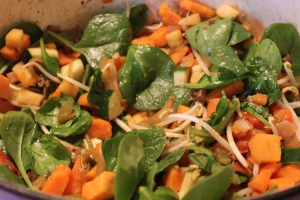
Ginger & Garlic Vegetarian Soup
Shopping List
- 1 box of low sodium vegetable stock
- 1 Med Onion Diced
- 4 Cloves of Chopped Garlic
- 3 Stalks of Diced Celery
- 2 Tablespoons of grated ginger, if you are using fresh throw in the freezer for a few minutes then grate!
- 2 Cups of Fresh Spinach
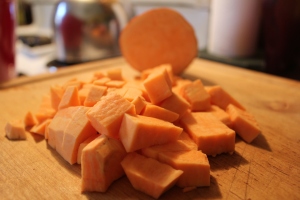
- 1 Large Sweet Potato Peeled and Chopped
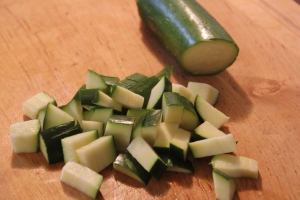
- 1 Med Sized Zucchini Cubed
- 1 Med Red Pepper Dicerd
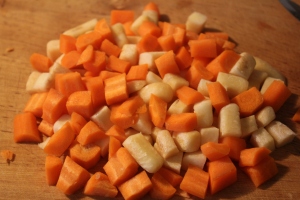
- 3 Med Carrots Peeled and Cubed
- 1/4 Cup Bean Sprouts
- 1/4 Cup Frozen Corn
- 1 Cup Mushroom, Chopped into Small Pieces
- 1/2 Teaspoon of Hot Chili Flakes
- 1 1/2 Cup Water
- 1 1/2 Tablespoon of Extra Virgin Olive Oil
- Kosher Salt and Cracked Pepper to taste
What to do…
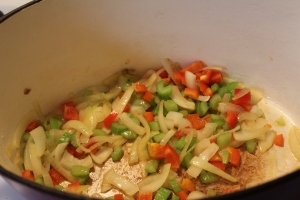
In a large stock pot turned on Med 5-6 with Olive Oil.
Add your Onion, Celery, Red Pepper, Chili Flakes, Garlic & Grated Ginger to Sautee. Add 1/4 Cup of Chicken Stock
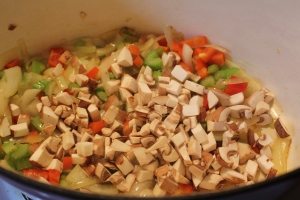
Add Mushroom
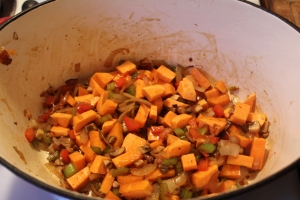
Add Sweet Potato, Carrot & Turnip
Add Zucchini
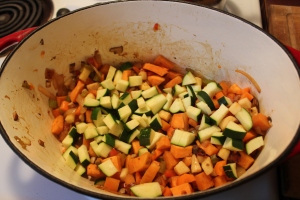
Add Bean Sprouts & Spinach
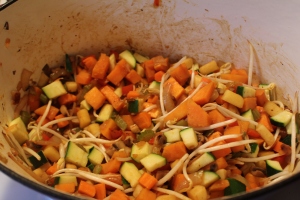
Add Vegetable Stock, Strained Tomatoes & Water
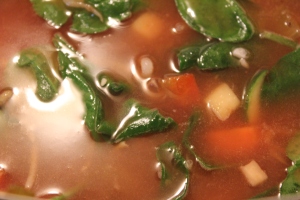
Let these ingredients cook out for an hour on low heat!
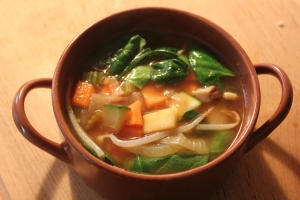
A piping hot bowl of healthy and hearty Garlic & Garlic Vegetable Soup!!
Thanks for joining me once again.. I hope you enjoy this recipe!!
Until we meet again, Cheers and Happy Cooking!
If you have an recipe, an idea, a request or a comment I can be reached at schoonerpixie@hotmail.com and can also be found on facebook at Schooner Pixie’s Kitchen!! Hope to hear from you soon!
2 Comments
February 25, 2013 at 1:28 pm (asian, Food/cooking)
Tags: appetizer, asian, chinese, chop sticks, delicious, dipping, dumpling, entertaining, peanut, pork, sauce, snack

“Homemade DanDan Dumplings with Dipping Sauce”
First of I have to give all the credit to my husband for this idea, his idea I just went ahead and made them.. And I would say that by far these are one of the best and most delicious appetizers I have ever made!! Of course the DanDan noodles which I have already blogged about https://schoonerpixieskitchen.wordpress.com/2013/01/20/holy-dan-dan-noodles/. Right now they are our favorite Asian dish, and have served them to friends and family so when John came up with the idea I knew they were going to be amazing, I just didnt know how amazing. … Well let me tell you… how to make them 😉
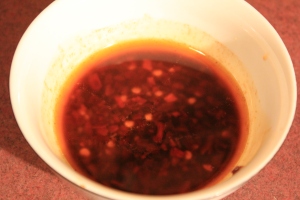
Dumpling Dipping Sauce
This should be made at least an hour before as you want to combine all the flavours together before eating.
Ingredients:
- 6 tablespoons soy sauce
- 3 tablespoons black rice vinegar
- 1 teaspoon hot chili oil
- 1/2 teaspoon granulated sugar, or to taste
- 1 clove garlic, grated with a microplane
- 1 teaspoon ginger grated with microplane (Tip: put your ginger in the freezer to keep fresh and make it easier to grate)
Combine in small bowl and let sit!
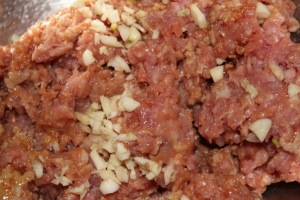
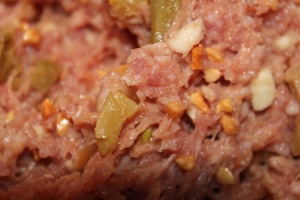
The Pork Mix the filling
- 1/2 lbs ground pork or beef
- 1 tablespoon peanut butter and 1 tablespoon of vegetable oil
- 2 teaspoons minced garlic (about 2 cloves)
- 1 teaspoon minced ginger (I freeze mine then use a micro planer to grate it)
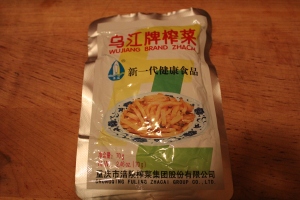
- 1 package of Sichuan preserved vegetables
- 1 tablespoon Chinese rice wine or dry sherry
- 1/2 teaspoon salt, or salt to taste
- 1 handful dry-roasted peanuts crushed
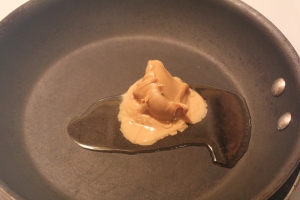
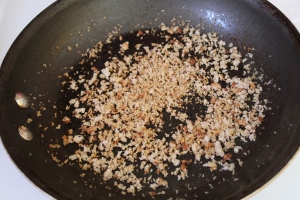
First in a med size frying pan on med heat add your heaping tbsp of peanut butter and oil. Let warm and melt.
Remove from heat then add your meat, don’t cook the meat, as you want your filling to be raw!


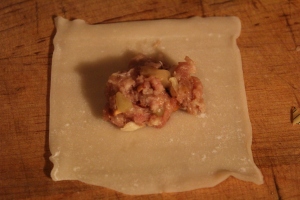
Laying your wonton wapper from corner to corner, diamond shaped, add a heaping 1/2 tsp of your filling, take your finger and dip into water bowl covering all edges of the wrapper with water, this helps to seal the wrapper in the cooking process.
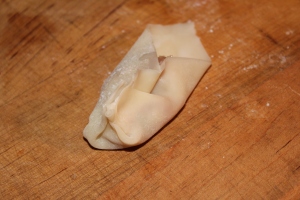
Grab the top and bottom tips and squeeze them together.

Then take the left side in by folding the wrapper in mutiple times towards the middle corner.
Now it’s time to cook the dumplings, in a large frying pan set at 6 warm with a splash of Extra Virgin Olive Oile. When you can smell the oil lightly add the Dumplings to the pan, let fry for a couple of minutes until you notice the bottoms starting to turn golden.
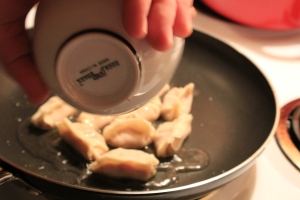
I dont have a cover for this pan so we used a pizza pan!
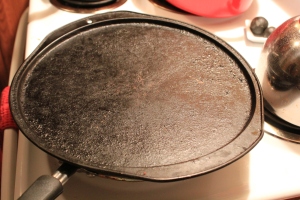
Let them steam for 5 minutes and check. They should look like this

Continue steaming until the water dissolves, remove cover and let fry until the bottoms are completely golden.
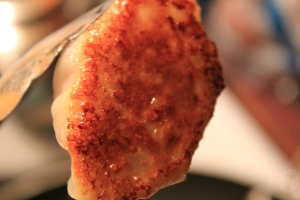
When golden remove from heat, plate with dipping sauce and chopsticks and get ready to fall in love……

I hope you all enjoyed this blog as much as I know you are going to enjoy eating these delicious little morsels!!
Any ideas on what I should cook next or comments please feel free to email me at schoonerpixie@hotmail.com
You can also join me on facebook at https://www.facebook.com/#!/SchoonerpixiesKitchen.
To be honest I don’t know what is on the menu next but there are a few ideas floating around, one of them being homemade donairs with donair meat made with ground turkey…. Tonight my plan is to cook a new dish for supper so when I figure out what that is I will be sure to share it with you all next time.
Until next time Happy Cooking & Enjoy!!
1 Comment
February 23, 2013 at 2:39 am (Food/cooking)
Tags: baby spinach, boiled, cheese, cranberry, delicous, dressing, easy, egg, family, fruit, low fat, lunch, mandrin, oranges, poppyseed, red onion, salad, salad dressing, slivered almonds, supper, toasted

Poppyseed Dressing
You will need:
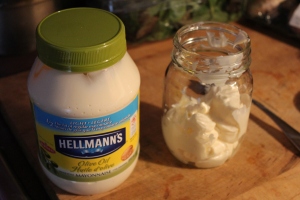
- 3/4 cup of Hellmans Light Extra Virgin Olive Oil Mayo
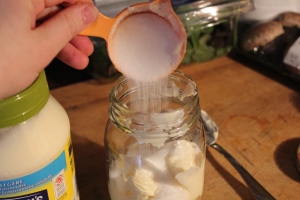
- 1/3 cup of sugar
- 2 tablespoons of cider vinegar
- 2 teaspoons of poppy seed
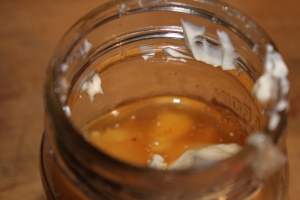
In a mason jar add your mayo.
Next add your sugar.
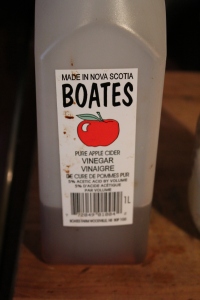
Next add the cider vinegar.. I bought mine locally from Boate’s located in Woodville, NS but any kind will do.. I go local if I can! 🙂
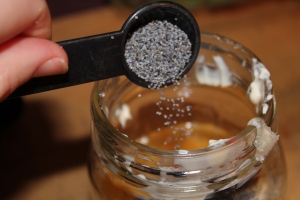
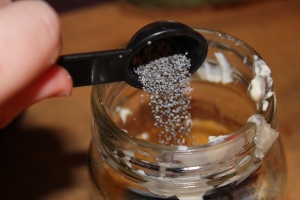
Finally add your poppyseed which can be purchased at your local Bulk Barn.
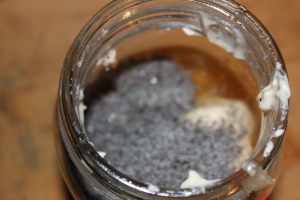
Cover your mason jar with a lid and shake vigerously to mix for about 3 minutes… put in the fridge to chill, covered in the Mason jar this will keep for 2 weeks but I guarantee it won’t last that long!

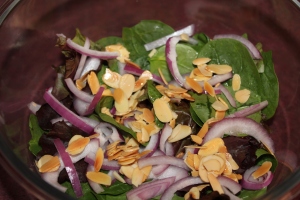
Kicked up Spinach Salad!!
You will need:
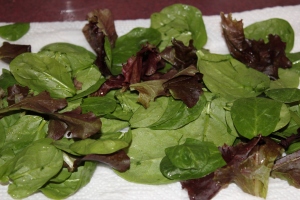
- 1/2 package of baby spinach, washed and dried (I also remove the stems)
- 3 tbsp slivered almonds
- 2 tbsp olive oil
- 2 cloves garlic whole
- 1 egg boiled and sliced
- mandrin oranges peeled and seperated (can also used canned)
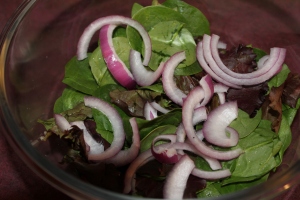
- 1/2 red onion sliced
- 2 tbsp dried cranberries chopped
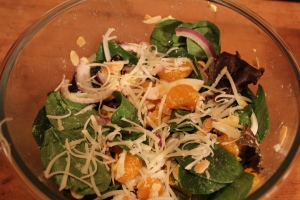
- 3 tbsp of skim mozzarella cheese
This is a pretty straight forward recipie.. first I remove all the stems from my baby spinach, then put it in a strainer to be washed. When washed I place the spinach on paper towel to dry. If you have a salad spinner omit the last two steps and use the spinner!
In a frying pan on low heat add your extra virgin olive oil and whole garlic, I usually crush a garlic with a knife to help release all the flavour. Then add the slivered almonds to toast them.
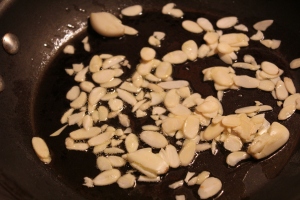
Remove garlic cloves and put toasted almonds on a sheet of paper towel to remove some of the access oil. Remove the garlic cloves and put toasted almonds on a sheet of paper towel to remove some of the access oil. Add the red onion.
Add the toasted Almonds.
Next add the egg and the mandrin oranges (I made this salad again the next day with fresh navel orange and pineapple, you could also use apple any fruit will work)
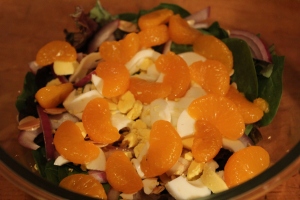
Add skim mozzarella cheese.
Top with Poppyseed Salad Dressing and the chopped dried cranberries to finish!
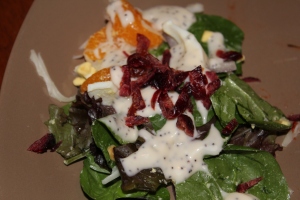
So thats it, a salad that you will love and keep on loving.. The dressing is amazing and could become addictive, but if you use the light ingredients like I mentioned in the recipie, then you should be good to to.
Any ideas or comments please email me at schoonerpixie@hotmail.com
or you can join me on facebook at https://www.facebook.com/#!/SchoonerpixiesKitchen.
Next up we are trying one of my fav recipies in a dumpling… thanks to my husband John’s great idea!!
Dan Dan Dumplings with Dumpling Dipping Sauce
Until next time enjoy & happy cooking!!!!
Leave a Comment
February 20, 2013 at 12:15 pm (Food/cooking)
Tags: canned milk, celery, cheese, cowder, delicious, dinner, easy, family, garlic, low sodium, lunch, mushroom, onion, pork chops, potato, smoked chops, soup, stock, sweet potato

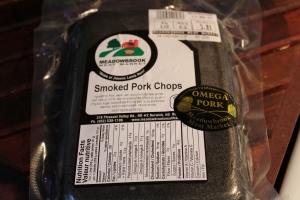
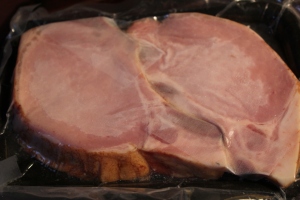
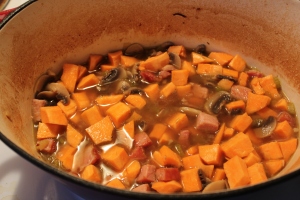
“Smoked Chop Chowder”
So as I told you in my last blog I decided to try my own take on my cousin Nick’s Smoked Chopped Chowder. This is one of his original ideas and I thought it sounded too mouth watering not to try myseld.. and of course it turned out delicious!! I loved this dish because I got to take a trip to my favorite local meat market Meadowbrook Meat Market to purchase the smoked chops, something I had never tried before!
What you will need:
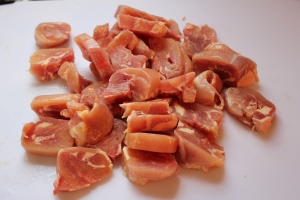
- 2 smoked chops cubed keep the bones
- 1 can light evaporated milk
- 1 carton of low sodium chicken stock
- 1 cup of water
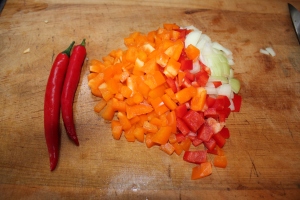
- 2 med sized onions chopped
- 3 cloves of minced garlic
- 2 stalks of diced celery
- 2 green onions
- 1 package of mushrooms sliced (cremini or white)
- 1 med sized sweet potato peeled & cubed
- 3 med sized yellow potatos peeled and cubed
- 1/2 cup grated low fat old cheddar cheese, Nick uses a block of Velveeta, sounds delicous however I used the cheddar because I am still watching the calories and fat intake 🙂 So it’s up to you!!!
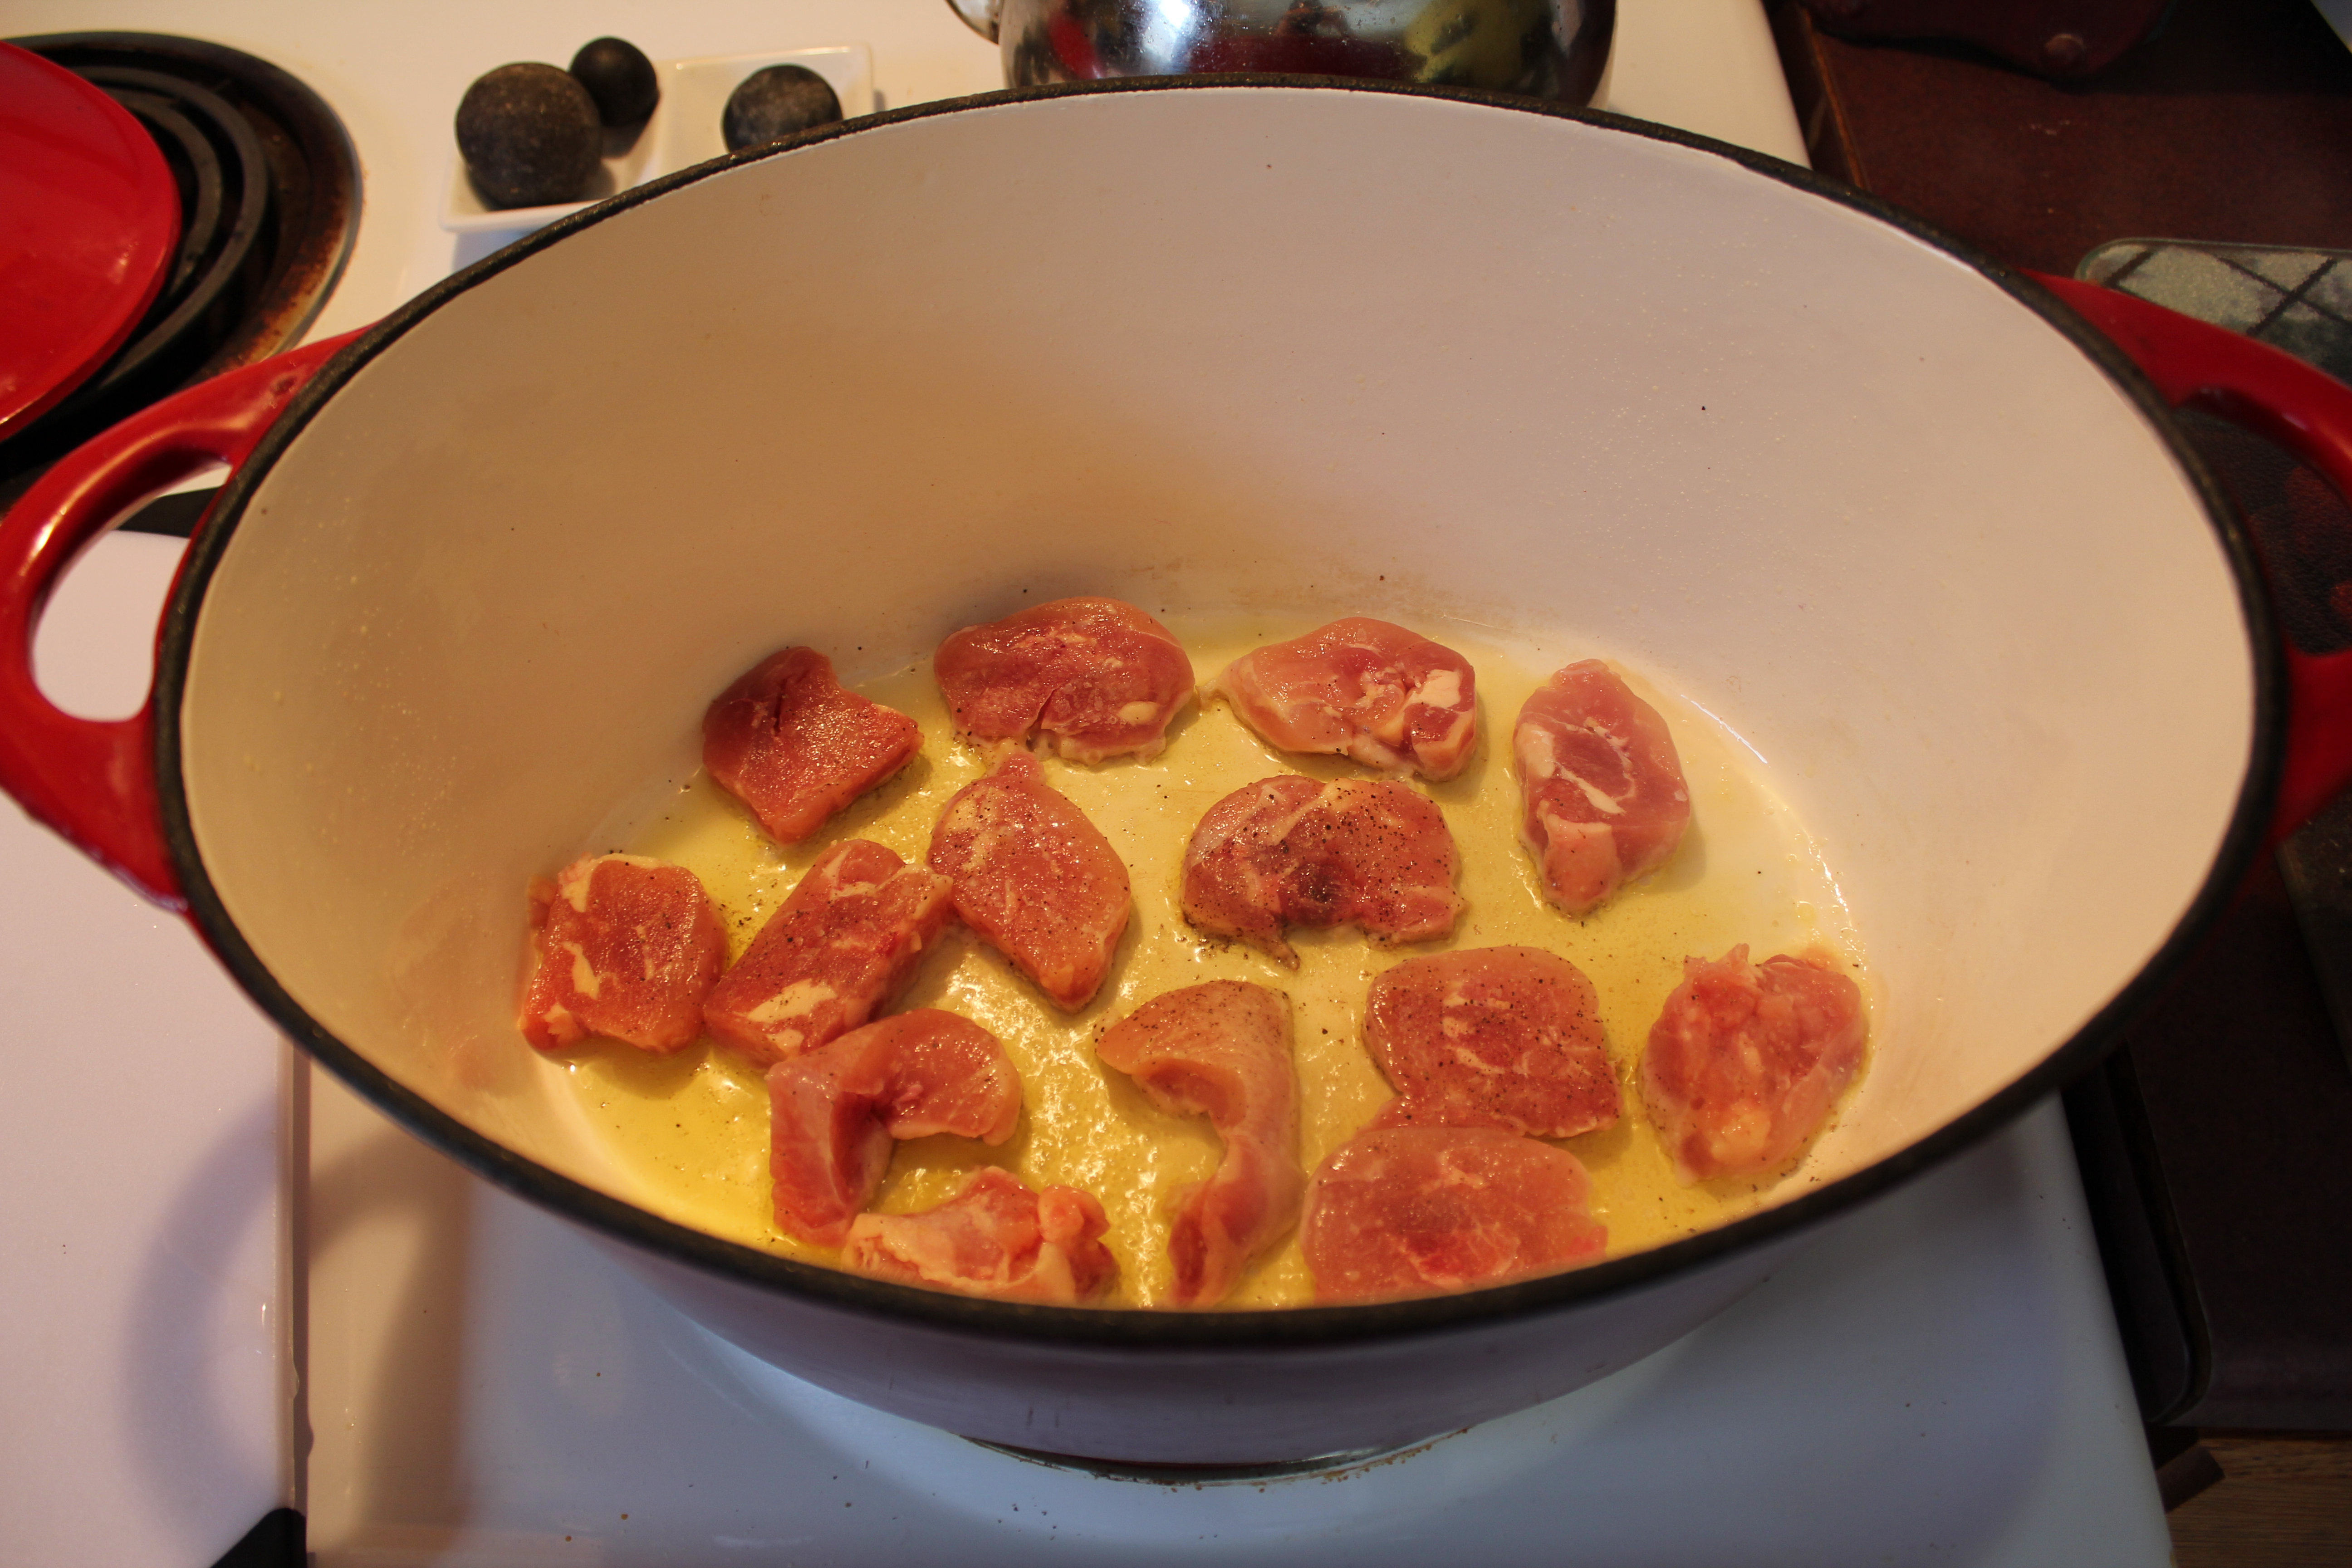
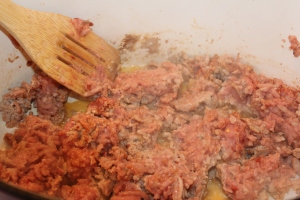
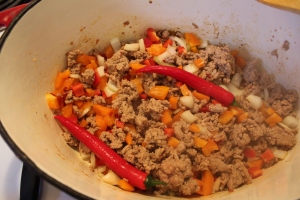
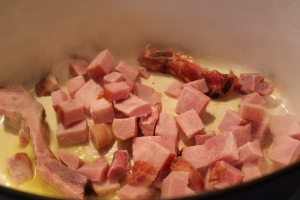
Preheat the oven to 350. Turn burner onto 7, in an oven ready pot or roaster (I used my amazing dutch oven) Add to the bottom of your pan some extra virgin olive oil, put in your cubed pork and bones fry until browned. When browned add your onions, celery and garlic. Add some of your stock enough to cover the meat and veggies.
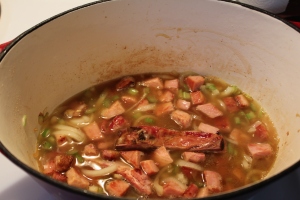
Cover and bake in oven for 45 minutes to tenderize the meat. Next add your sweet potato, yellow potatos and mushrooms!
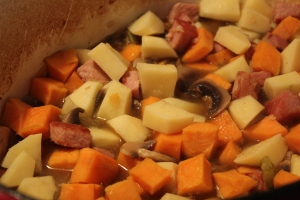
Add the remaning stock, can of evaporate milk and water. On the stove at about 6 cover and cook until the veggies are tender, for about 30-45 minutes. Make sure it doesnt come to a boil or your milk will curdle, so if you need to turn it down do so just dont let it come to a boil.
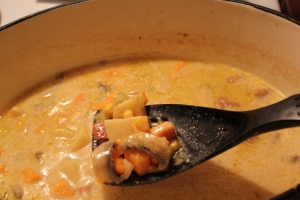
When everything is tender, then add your cheese, let melt and sit for another 10-15 minutes. I forgot to add the green onion to mine but this is when I would do it. Season to taste with salt and pepper! This is another thing I have been meaning to tell you but I use Kosher salt, I have a bowl of it sitting on my counter. We use this because it is better for you and has the salt taste with out being iodized, it’s a more natural product!
This turned out awesome and I love that I got the idea from my cousin.. It’s an amazing that I will definitly make again! Hope you give it a try too!!

Next up I am going to show you how to make the most Amazing Poppyseed Dressing you have ever tried,
along with the most delicious, kicked up Spinach Salad.. Stay tuned, it’s coming soon!!
Any requests for a recipie you would like me to try pleae email me at schoonerpixie@hotmail.com
You can also join me on facebook at https://www.facebook.com/#!/SchoonerpixiesKitchen.
Until next time Enjoy & Happy Cooking!!!
Leave a Comment
February 16, 2013 at 10:39 pm (Food/cooking)
Tags: beans, brown rice, corn, curry, delicious, dinner, onion, peas, potato, stock, sweet potato, tomato, vegetable

“Curried Chicken with Tomato & Onion Salad”
After spending a weekend away with family to celebrate our sons birthday, we did alot of talking about food.. As we all have a passion for great cooking and healthy eating. This dish is my Uncle Charlie’s speciality, and after trying I loved it! He is pretty secreative about his recipies but for some reason he told me how to make this dish and I just added my own personal touch! It turned out delicious and John says he now wants to add this dish to our rotation.. Can’t get much more of a compliment than that!
Because this needs to marinate, I am going to first show you how to make the Tomato & Onion Salad, this can marinate in the fridge while you are making the main course.
You will need:
- 1 large tomato sliced as thin as possible, like paper thin
- 2 small onions also peeled and sliced as thin as you possibly can
- 1.5 cups of white vinegar
- 2 tbs white sugar or sweetener
In a med sized bowl add the tomato, onion and sugar mix well then add the vinegar. Cover and place in the fridge.
Now onto the Curried Chicken…….
You will need:
- 3 tbsp dried yellow curry
- 1 carton of low sodium chicken stock
- 1 package of boneless chicken thighs chopped into chunks
- 2 onions sliced
- 3 cloves of minced garlic
- 3 tbsp of hot sauce
- Dash of dried chili flakes
- 1/2 tsp cardamon (comes whole and needs to be crushed with mortar and pestal)
- 2 tbsp of butter
- 1 half of a large sweet potato peeled and cubed
- 3 med size potatos peeled and cubed (dont need to be prefect this is a rustic dish)
- Half a package of frozen veggies (only because they are out of season) which include peas, corn cobs and green beans
- 3 med size carrots peeled and chopped into rustic size pieces
- 2 cups brown rice
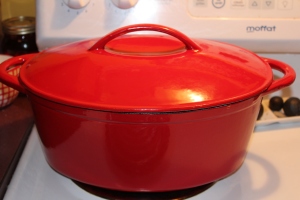
Of course for this dish I used my amazing dutch oven… if you dont have an enamel pot a roaster will do, the main thing is it needs a cover as it bakes in the over!
Preheat your oven to 350.
Turn burner on at 7. Add extra virgin olive oil to the bottom of the pan, when warmed, add your chicken. Brown, remove and then set aside.

In a mortar and pestal add your cardamore, crush and remove shells.

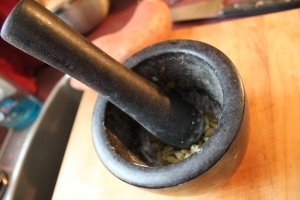

Add onions, garlic and dried chili flakes. Satuee.

Add butter and after it is melted now it is time to make a rue by adding the curry and cardamon. Mix together and make a paste!

Next add the carton of stock and half a cup of water then stir together creating a curry broth.

Add all the remaning veggies.

Cover and bake in oven for 1-1.5 hr or until veggies are tender.
In the meantime prepare the brown rice.
To plate add the brown rice, then top with curry and place the tomato & onion salad as a side.
Now it is finished and ready for all to eat and enjoy!

I hope you all enjoyed reading this blog. I also hope you try cooking this at home and that you loved eating it as much as we did!
Any suggestions or ideas on what I should be cooking next please email me at schoonerpixie@hotmail.com.
You can also join me by adding yourself to my facebook group
https://www.facebook.com/#!/SchoonerpixiesKitchen
Next up I am going to show you how to make “Smoked Chop Chowder” another family speciality.
Until next time Enjoy & Happy Cooking!!
Leave a Comment
February 14, 2013 at 7:47 pm (Food/cooking)
Tags: cheese, cottage cheese, delicious, dinner, easy, family, healthy, italian, lasagna, oven, skillet, tomato

Happy Valentine’s Day Everyone!!
I know it has been awhile since I posted last but life passes you by quickly and believe it or not sometimes this blog is not one of my top priorities… I do want to say that no I did not make this for my sweetheart for Valentines day but I made this recipe last week for my boys and of course it was a big hit.. It is also a very healthy dish which for us is important to us!! So here’e what you have been waiting for my recipie for:
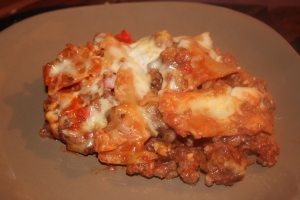
“Homemade Skillett Lasagna”
You will need:
- 5 sticks of lasagna oven ready, smart pasta or whole wheat broken into pieces
- 1 cup of fat free cottage cheese
- 1/2 cup of grated Skim Mozzarella Cheese
- 1 jar of strained tomatoes (San Marzano’s are the best)
- 1 med onion chopped
- 1 red bell pepper chopped
- 3 cloves of minced garlic
- 1 lbs of lean ground beef
- 1 tsp worstchestershier sauce
- pinch of dried hot chili flakes
- drop of Extra Virgin Olive Oil
- 2 tbsp Italian Seasoning
Preheat the oven at 350. For this dish I used a cast iron pan and to finalize the dish I baked it in the oven in a foil pan, you dont need the foil pan however I had one on hand and didnt want the bother of washing 2 dishes.. hey I am normal who really likes doing dishes 😉
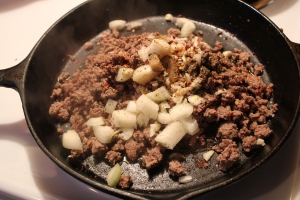
Turn your skillet on med, add drop of extra virgin olive oil, add your ground beef, minced garlic, onion and red pepper. Season with Salt & Pepper, worstchestershier sauce and italian seasoning and chili peppers.
I know this may sound a little crazy but for those of you who are watching your weight, I cooked my beef first, then put it in a strainer and rinsed it under hot water to remove any excess fat.. it seems like work but it is easy and every little bit counts!!
Next add your bottle of jar of strained tomatoes.

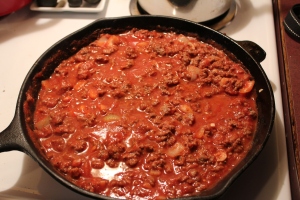
Now take this mixture and put into the larger pan if your frying pan can be used in the oven and holds alot there is no need to change the pan, as it is called “SKILLET” lasagna.
Once transfered to the second pan, add your lasagna noodles, then add the cottage cheese. Then Mix it up!!
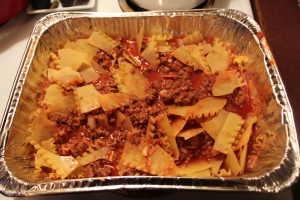
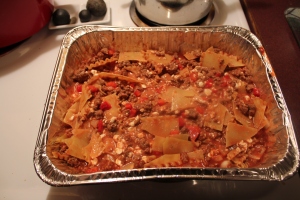
Cover with the half cup of skim mozzarella cheese. Bake in the oven for a half hour or until noodles are cooked through.
Now it time to eat & enjoy!!
Hope you enjoyed this recipe.. I will tell you it is alot easier than making the whole lasgana and alot healther for you! I have a couple of great recipies I am going to try next thanks to a visit with my family this weekend.. Curried Chicken and Smoked Chop Chowder coming up next… Still have yet to get any requests for me to try out any recipies but if you have any ideas please feel free to email me at schoonerpixie@hotmail.com
You can also find me on facebook @ https://www.facebook.com/#!/SchoonerpixiesKitchen
Until next time Enjoy & Happy Cooking!!!
2 Comments
January 31, 2013 at 12:19 pm (Food/cooking)
Tags: calcium, carrot, celery, celery root, dinner, dominican republic, easy, family, healthy, lunch, potato, soup, vegetable
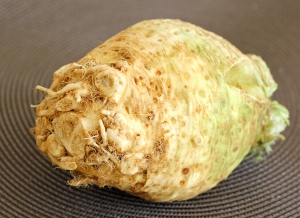
Crema de cepa de apion
“Creole celery root cream soup”
First off if your wondering where I got this idea, it came to me after searching ‘celery root’ on pinterest.. It looked good on there so I decided to make it for my lunch as I had some left over celery root hanging out in my fridge just waiting to be eaten 😉
After reading up on it I discovered that this soup was described as a typical delicacy of Constanza a scenic highland region in the center of the Dominican Republic…. Cepa de apio is said to have excellent nutritional value, medicianal qualities and a very high source of calcium! Sounds good to me!!
Ingredients
- Olive Oil
- 1 med onion chopped
- 2-3 celery stalks chopped
- 2 small carrots sliced and diced
- 3 med potatos peeled cubed
- 1 celery root peeled and sliced (I used the left over mashed from the night before worked awesome)
- 1 tsp cumin powder
- 1 bay leaf
- salt and pepper
- 8 cups of vegetable stock (chicken also works)
Instructions
- Heat the oil in the pan med-low heat
- When oil is hot, add onions fry until soft
- Add cumin powder and bay leaf
- Add celery and a couple of minutes later add your carrots, celery root and potatos (keep on very low heat)
- Cover the pan and sweat for several minutes, stirring occassionally to prevent sticking or burning
- Add vegetable stock & simmer until veggies are cooked. Leave to cool
- Once cool blend the soup and season to taste, adjust by adding water if necessary
- reheat and serve, fennel also makes a nice garnish for this soup if you have some
- Also if you like heat, adding cayanne to this soup is so good!!

“El producto final”
The finished product in Spanish!!
Thats it for today, hope you enjoyed!!
Again any suggestions or ideas for dishes you would like to see me make please feel free to comment on the blog or you can join me on my face book page @
https://www.facebook.com/SchoonerpixiesKitchen
You can also email me at schoonerpixie@hotmail.com
Until next time, Enjoy & Happy Cooking!!
Leave a Comment
January 28, 2013 at 8:10 pm (Food/cooking)
Tags: bread crumbs, crab, easy, fun, japanese, lunch, nori, pollock, rice, rice vinegar, soy, spicy, sushi, wasabi, whole grain

“Spicy Crab Sushi & Crema de cepa de apio”
Well my lunch today was all about me! And I have to say it turned out just the way I like it!!
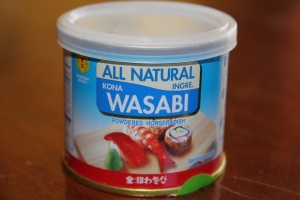
So to start off today I am going to show you how I made Spicy Crab Sushi including homemade Wasabi…
You will need:
- 1 Slice of Whole grain Bread
- 1 bamboo mat
- 2 sheets of saran wrap
- 1 sheet of nori paper with the last row removed from the paper
- 1/2 cup of crab flavored pollock
- 1/2 cup sushi rice
- 1/2 cup of water
- 1 tsp of seasoned rice vinegar
- Sprinkle of powered wasabi
- Sprinkle of sesame seeds
- Soy Sauce for dipping
- 1 tsp of wasabi
So for the rice I cooked it in one of our favorite appliances, the rice cooker.. to get the directions on how to make it stove top read the label on the backside of the sushi rice bag! I actually made my rice first thing in the morning so it had alot of time to cool off, no need to put it in the fridge just set it aside in your rice cooker or the pot you cooked it in.
Take your one slice of bread, and grate it to bread crumbs. Warm a small skillet at 4 with the bottom covered in Extra Virgin Olive Oil, then toast your bread crumbs to later add to the sushi.
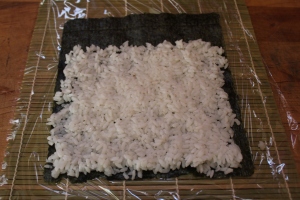
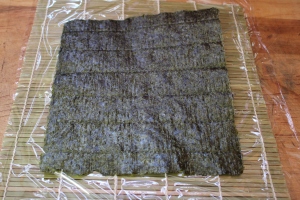
On a large cutting board lay down your bamboo mat covering it with one sheet of saran warp, then place your nori paper of top of that. When the nori paper is laid down add your rice, not all of it because it’s to much so add it as needed. Wet your finger tips and flatten the rice unto the nori paper leaving only 1 perforated space remaining empty. Sprinkle on the sesame seed. Remove nori paper and rice with the saran wrap from the bamboo mat, placing down the second sheet of saran wrap, flip the rice facedown unto the saran warp, with the nori paper now facing up.
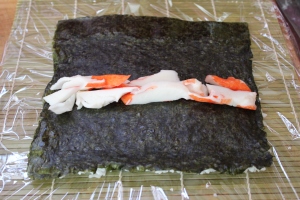
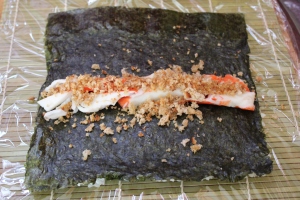
Get your crab flavored pollock, cut into med sized pieces. Line the whole row legenth wise about an 1 1/2 inches from the bottom of the paper. Then cover the pollock with the toasted bread crumbs. Sprinkle on a LITTLE bit of the powdered wasabi onto the top of the row.
Fold over on the side closest to you, then roll the remaning side over, continue to tighten and roll with the bamboo mat. When it is rolled remove from the saran wrap. Cut roll into .5 inch slices, makes around 7-8 pieces.
Take your powered Wasabi, in a small dish add 1 tsp of powder, .5 tsp of water, mash together and combine until it can be rolled into a ball. Place on the plate with sushi pieces.
In a small dish add soy sauce for dipping!!
すべて完了
Subete kanryō
Meaning “All Done” in Japanese

So for todays blog I am done, and if you are interested in finding out how to make the delicious Crema de cepa de apio, a Creole Celery Root Cream Soup, a speciality dish made in the Dominican Republic please come back tomorrow..
Any ideas or suggestions, please feel free to email me at schoonerpixie@hotmail.com or join me on my facebook page
@https://www.facebook.com/#!/SchoonerpixiesKitchen
Until then Enjoy & Happy Cooking
Leave a Comment
« Older entries